Capture and add receipts
Capturing your receipts is the first part of the expense process. You can capture your receipts in a number of ways:
-
If you haven't yet started an expense claim, go to Entry > Receipt Capture or Entry > Task Pad > Receipt Capture to add receipts to an expense claim later.
-
If you have started an expense claim, go to Entry > Staff Expenses > My Expenses > Active and select a claim. Click Add receipts to add receipts to it.
-
You can also add receipts from Entry > Staff Expenses > Receipts > Add receipt.
-
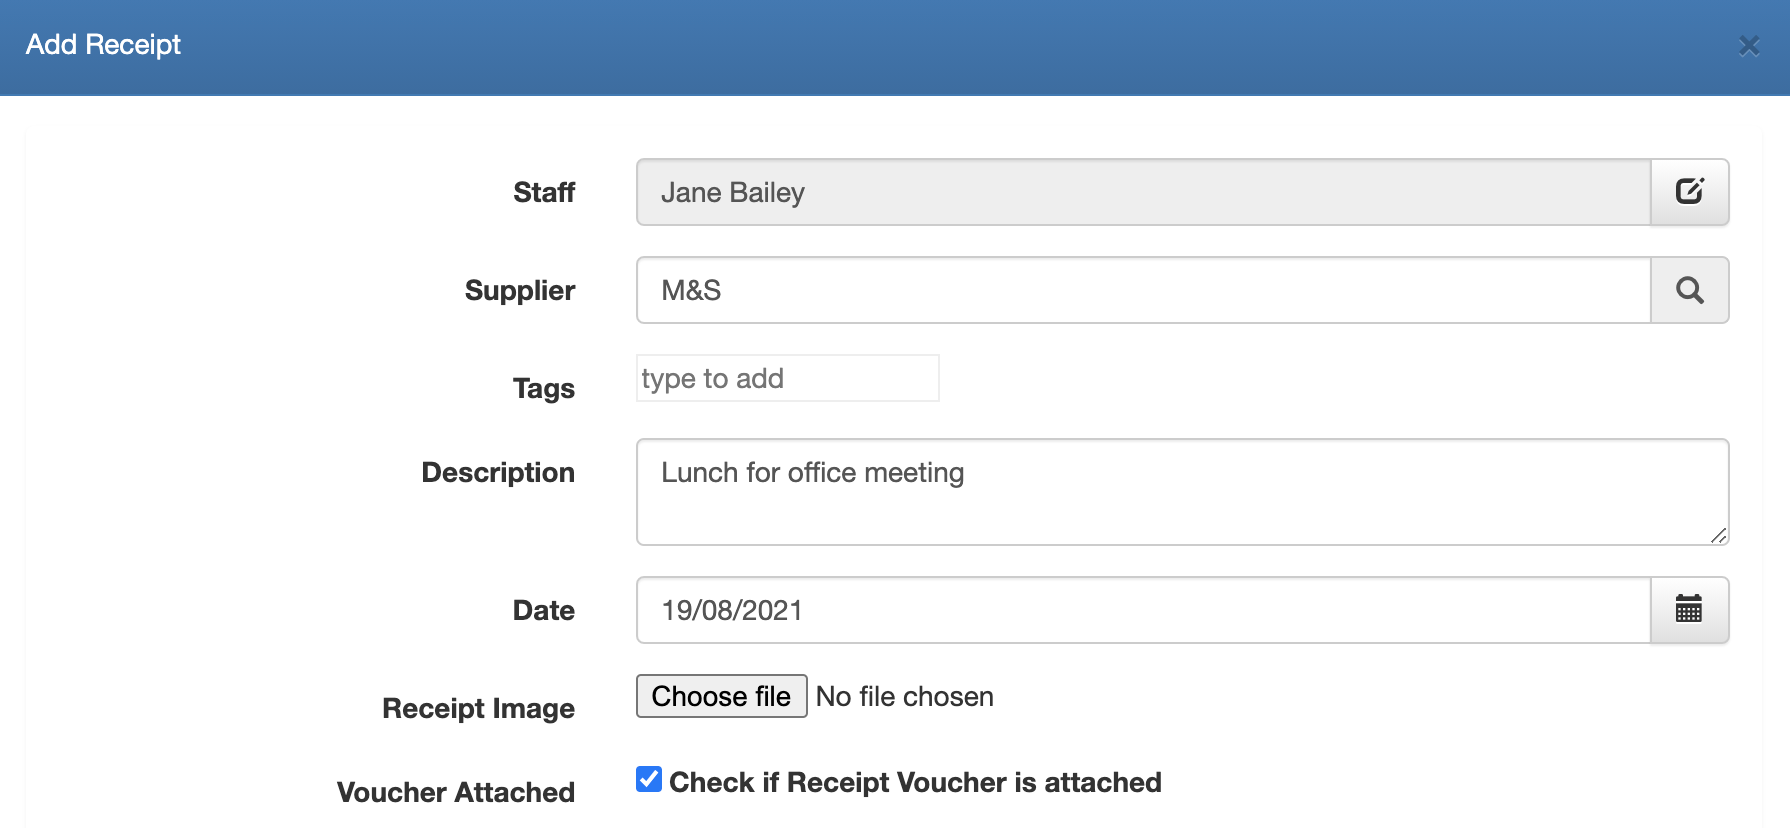
On the Add Receipt screen, in the Supplier box, enter a supplier.
The Staff field defaults to your name. If you have the appropriate permissions and you want to capture this receipt for someone else, click the edit icon to choose a different staff member.

-
Optionally, enter Tags. (Tags allow you to group your receipts and are used on the Unattached Receipts tab to filter receipts.)
-
In the Description box, enter the purpose of the expense.
-
Check the date in the Date box. This defaults to the current date, but click in the box to change to the date of the actual receipt.
-
In the Receipt Image box, click Choose file to select a saved image. (If you're using a mobile device, this will activate the camera so you can take a photo of the receipt.)
The Voucher Attached check box is automatically selected once an image is uploaded but you can manually select this option if a physical receipt will be provided.
-
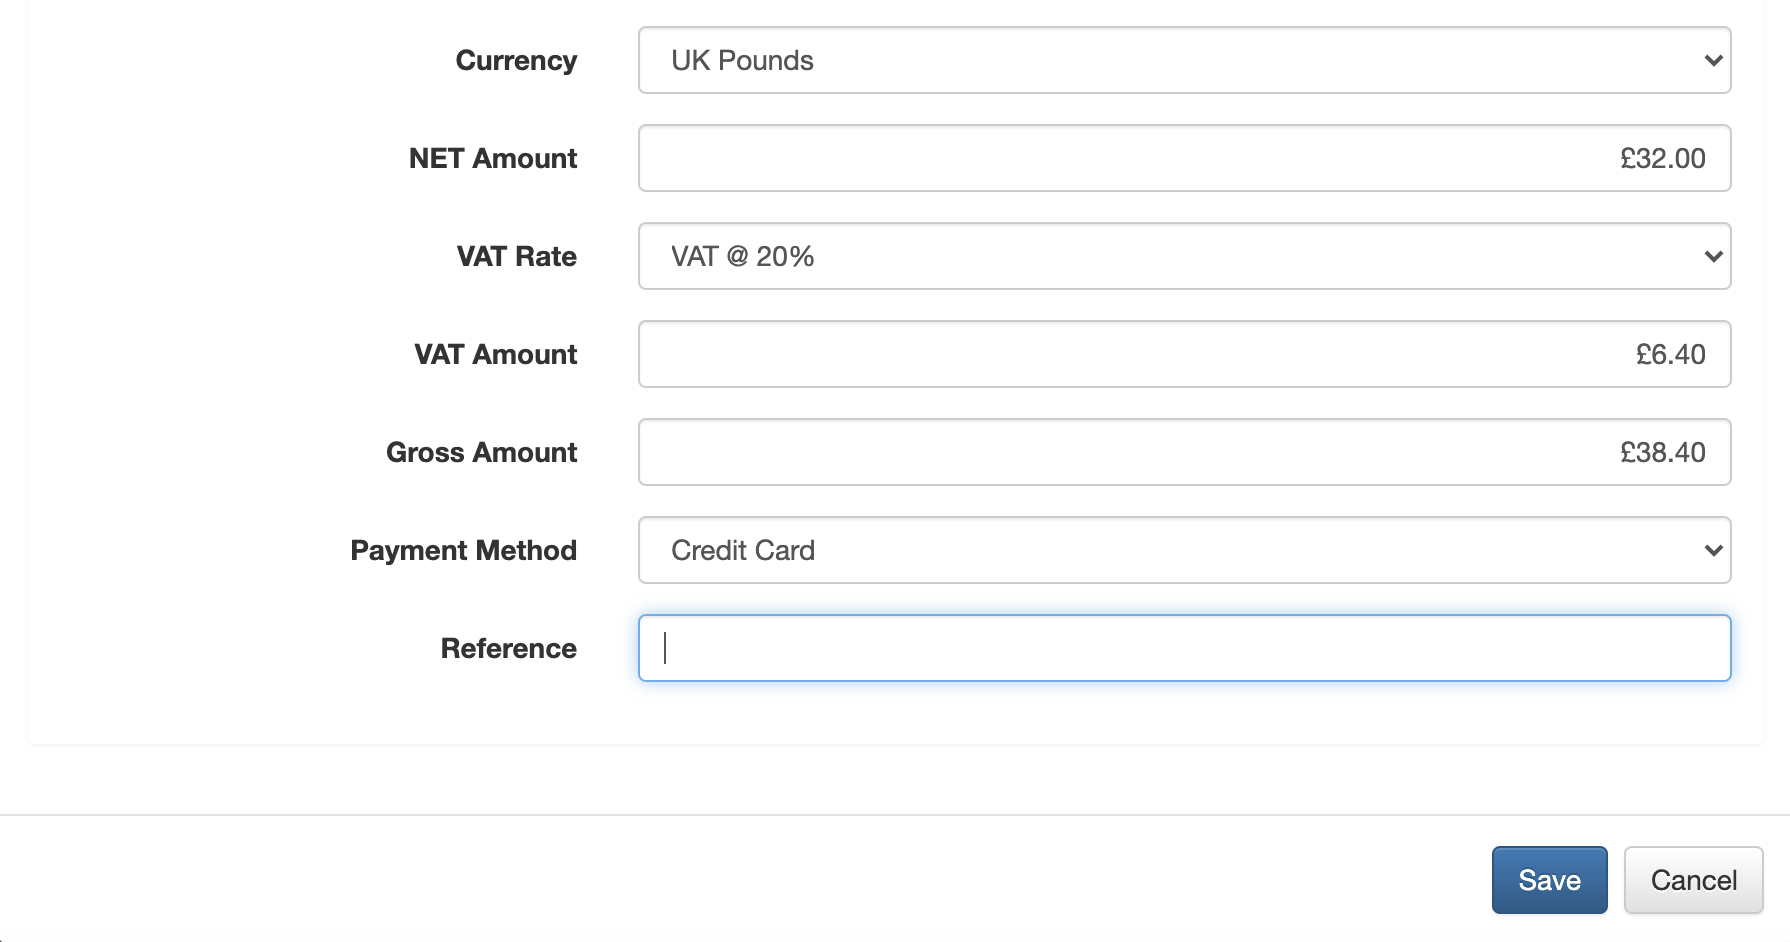
If the payment was made in a different currency than the default, on the Currency list select the currency. The Foreign Amount box is displayed. This is for information purposes and will not calculate the local currency amount.

-
In the NET Amount box, enter the net amount on the receipt.
-
On the tax list, select the tax rate to be applied. The tax Amount value is calculated based on the entry in the NET Amount box, if entered.
-
The value in the Gross Amount box is calculated based on the total of the NET Amount and tax Amount entries. However, you can enter a gross amount and the net and tax amounts are calculated.
-
Enter the Payment Method and a Reference.
-
Click Save or Save > Save and Allocate.