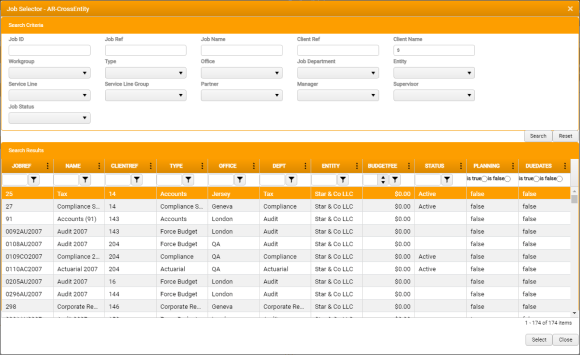
The Job Selector
When transferring unallocated cash, the Job Selector allows you to select the target Job to which to post the remaining balance on the Receipt.
It can be used to select any Job in any Entity, for any Client, and can be accessed from the right-click context menu in either the Item List or the Other Item grid in Other Allocations, or by clicking the Transfer Unallocated Cash button in the Item List .
To enter a Job search:
- Enter any appropriate Search Criteria that would help to narrow the search.
-
Click Search .
Any matching Job records that match the Search Criteria you entered are displayed in the Search Results .
Search results may include Jobs that belong to any Client.
If you need to narrow your search, enter additional Search Criteria and click Search again.
You can also clear individual Search Criteria, or click Reset to clear them all and begin again.
- In the Search Results , apply any sort options or filters that will help to refine your selection.
-
Select the Job to which you want to transfer the cash from the Search Results .
You can organize the Search Results by applying Column Sorting and Filtering.
-
Click Select .
The Job is selected, the Selector is closed, and the application displays a prompt for confirmation:
" Are you sure you want to transfer unallocated cash to the selected Job? ".
-
Click OK to confirm the transfer and close the dialog.
If the target Job is in the same Entity and for the same Client as the source Job, a new Batch Item is created with the Unallocated Cash Job selected automatically.
If Cross Entity functionality is active in your organisation's implementation, a contra is created to write out the balance on the Receipt and a new Batch is created.
The Outstanding Items grid is updated.