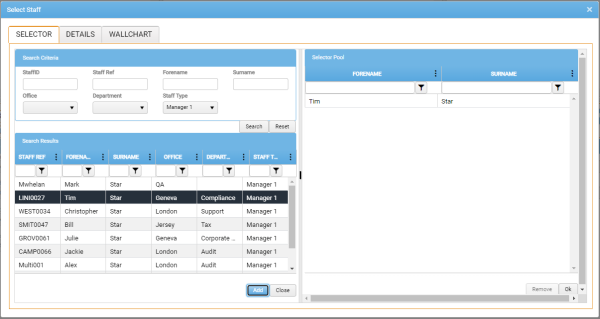
Select Staff
The Select Staff window is used to search for and select specific Staff members for scheduling. It is also used when replacing one Staff member or Staff Type with another Staff member.
When replacing or reallocating Staff, a different form of Selector, the Staff Selector window, is displayed. To add Staff Types to a schedule or replace a Staff member or Staff Type with another Staff Type, use the Staff Type Selector.
To open the Select Staff window from a Schedule View tab toolbar, select Add / Add Staff.
- Narrow your search by completing as many of the Search Criteria as possible. This will limit the eventual set of search results.
-
Click Search.
The Search Results region is populated by a grid that lists all of the Staff records that match the Search Criteria you specified.
Filters enable you to choose which columns are displayed in the grid, and to configure column-specific filter criteria. For details, see Column Sorting and Filtering.
To view further details of the Staff currently selected in the Search Results (details of the Job, Budget, Schedule, Actual, and Variance), select the Details tab.
In the Details tab, you can click Duplicate to display these Staff details in a new browser tab, leaving the main module tab as it is with the Select Staff window still in focus.
The Wallchart tab displays a Staff Wallchart view restricted to the display of data for the selected Staff only.
- In the Search Results grid, select the Staff you want to allocate to the schedule.
-
Click Add.
The selected Staff are added to the Selector Pool.
If you need to remove selected Staff from the Selector Pool, simply select them there, and click Remove. If you need to remove or replace Staff from a schedule, use the right-click context menu within the Schedule View's Staff grid.
-
When the Selector Pool contains only Staff you want to add to the schedule, click OK.
The Select Staff window is closed, and the selected Staff are added to the schedule.