Menu Configuration
The Menu Configuration screen allows you to organise the display of the various options on a selected menu.
To access a Menu Configuration:
- Click the Configure button on the row that represents that Menu in the Menu List.
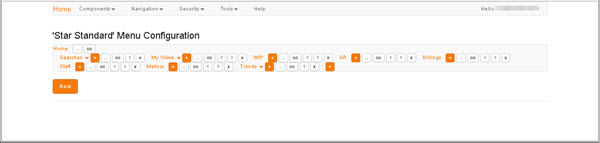
The first row in the highlighted region of this screen displays the Label of the selected Menu, which cannot be edited. The subsequent rows present a list (left to right) of the other options on this menu.
Every Menu Component has the following controls:
-
 Edit Menu Item - Displays the Edit Menu Item screen, in which you can edit the Label and Description.
 -
 Link Menu Item - Displays the Link Menu Item screen, in which you can select a Component to link to this Menu item.
Each Menu Item other than the Menu Label also features the following additional controls:
-
 Add Sub-menu Item - Allows you to convert this menu item into a sub-menu. Displays the Add Menu Item window.
 Once a sub-menu item has been added, a drop-down control is appended to the menu Item's Label for the configuration of that sub-menu. For details, see Sub-menu Configuration below.
 -
 Move Menu Left - Moves the menu item one place to left.
Not available on the first menu item after the Label.
-
 Move Menu Right - Moves the menu item one place to the right.
Not available on the last menu item.
-
 Delete Menu Item - Displays a Delete Confirmation prompt.
Sub-menu Configuration
If at least one sub-menu item has been added to a menu item using the Add Sub-menu control in the Menu Configuration, then the sub-menu drop-down control is activated.
Click the down arrow representing the sub-menu ![]() to display the sub-menu and configuration options.
to display the sub-menu and configuration options.
In this example, four sub-menu items (Clients, Contacts, Staff, Invoice) have been added to the main menu item Searches .

Each sub-menu item has the same configuration options as the main menu items, except:
- Move Menu Right becomes
 Move Menu Down, and
 - Move Menu Left becomes
 Move Menu Up.