Add or Delete a Process
You can add a Process in either the Due Dates Processes window, or in the Client UDF or Job UDF windows.
You can delete a Process only in the Client UDF or Job UDF windows, which are accessed via the View Client or View Job options in the Home Page toolbar.
- Add Process - Displays the Add Process window (see below), in which you can define a new Process relating to the current Client or Job
- Delete - Deletes the selected Process, along with any associated Steps and Notes. You are prompted to confirm the deletion
To add a Process, in either the Client or Job record:
-
Right-click at Process level in the grid, and select Add Process from the context menu.
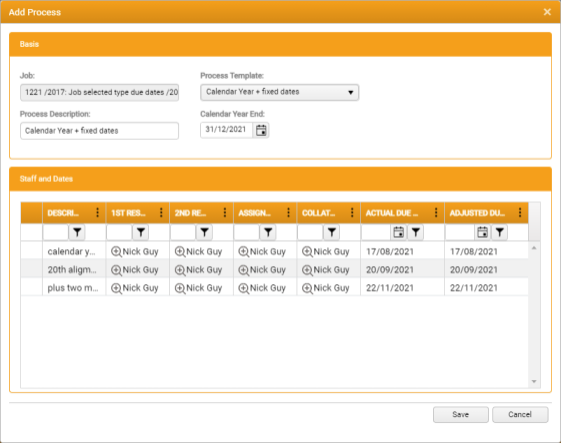
This displays the Add Process Window.

-
Job - The name of the Job selected for adding a process. The grid displays a list of every template currently associated with the Job Type of that Job
If an expected template is not listed, this is due to a mismatch with either the Job Type of the current Job or the Job Types defined in the Template.
- Process Template - Select the Template for the Process you want to add
-
Process Description - Edit the default Process Description. This will be is used for display, sorting and filtering in the Home Page grid
-
If Job Types were linked to the Template and are currently unassigned, you can select Staff for each role by clicking a Not Assigned button to display the Staff Selector

-
Click Save to close the window
You are returned to the Due Dates Processes window, in which the grid is refreshed to include a new row for the new process.
In the Basis region:
The Staff and Dates region presents a grid listing every step that is available for inclusion in the process, with a column for every configured role in the process, in addition to columns for the Actual Due Date and Adjusted Due Date.
Depending on how the template was defined, the roles are either Job Types linked to the template when the process was created or auto-populated by values derived from the Client or Job records.