Launcher Menu Configuration
The first screen in Launcher Configuration allows you to configure the main grid within which the various options (Items) that comprise each Menu are organised.
To configure a Launcher Menu:
- Select the Launcher within the Launchers grid.
-
Click Configure at the bottom of the grid.
This displays the Launcher Configuration screen, and the Launcher Menu and Launcher Items grids.
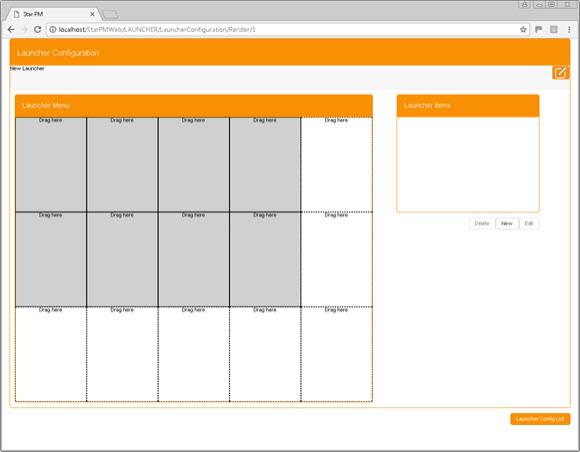
The Launcher Menu grid presents a preview of the Launcher Menu in its current state. The following example is blank, for a new Launcher.

Note the grey fields on the grid. These indicate the true size of the Launcher Menu. The Launcher Configuration grid always features an additional blank column, on the right, and an additional blank row, at the bottom of the grid. If you drag-and-drop an Item into either of these positions on the grid, then the grid is expanded automatically in the appropriate direction.
Here you can perform the following actions:
- Add Items to the Menu by using drag-and-drop to transfer them from the Launcher Items grid into the Launcher Menu grid.
- Remove Launcher Items from the Launcher Menu, by dragging-and-dropping them from the Launcher Menu grid back to the Launcher Items grid.
-
Change the position of Launcher Items within the Launcher Menu grid, again using drag-and-drop.
If you drag-and-drop one Item onto another, the two Items simply swap position.
If you drag-and-drop an Item from the Launcher Menu into the Launcher Items grid, the space it occupied in the Launcher Menu is left blank.
In a new Launcher Configuration, you must first create one or more Launcher Items: see Create a Launcher Item.