Setup Opportunity Groups
Opportunity Groups enable Opportunity trackers to categorise each Business Opportunity according to type, by making a Group selection from a pre-defined list
To access Opportunity Groups configuration in Star Practice Data Manager (PDM):
-
Select Setup / Opportunity Tracking / Groups.
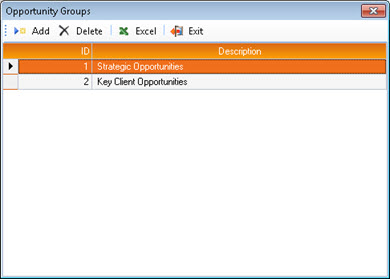
This displays the Opportunity Groups window. Any existing Groups will be listed here.
- Make any changes as required, as described below.
-
To exit Opportunity Groups, click Exit.

Any changes you have made are saved automatically.
Add a Group
To add an Opportunity Group:
-
Click Add.

This displays the New Opportunity Group window.
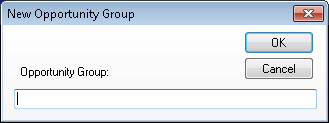
- In the Opportunity Group field, enter a brief definition of the Group.
-
Click OK.
The new Group is added to those listed in the Opportunity Groups window.
Edit a Group
To edit an Opportunity Group:
-
In the Opportunity Groups window, over-type the current value of the Group.
A pen icon in the first column confirms which grid row is currently in edit mode.

Delete a Group
If you do not have the required Staff Privileges you will be unable to delete Opportunity Groups.
To delete one or more Opportunity Groups:
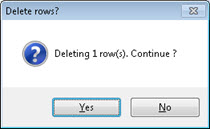
- In the Opportunity Groups grid, select the row of each Status to be deleted.
-
Click Delete.

You are prompted to confirm the deletion of the selected rows.
Export a List of Groups to Excel
To export a list of all current Opportunity Groups to Excel:
-
In the Opportunity Groups window, click Excel.

This displays a standard Saving Export window (file explorer).
- Brows to, and select the folder in which you want to save the exported Excel file.
-
Click Save.
The exported Excel file is saved to the specified location with the file name Opportunity Groups.xlsx and the Excel worksheet is opened automatically.
The Excel worksheet will contain two columns, ID and Description, that correspond to the grid display in the Opportunity Groups window.