Complete timesheet entries
Once you have finished filling in your timesheet entries, you need to identify that you are finished, by marking your timesheet as complete.
- If your timesheet needs to be approved, it will be made available to the person who approves your timesheets.
- If your timesheet doesn't need approving, it will be made available for posting against a client.
- If your Organization uses Classic Approval, although you can mark individual timesheet entries as complete, you will only be able to complete your timesheet once you have reached your target hours (the total hours defined in your work profile). See Complete timesheet with Classic Approval.
If your timesheets don't need to be approved, and automatic posting is enabled, the label on screen is changed to Release. Please see Release timesheet entries.
Only Active timesheets can be completed/released and a minimum of client, job, analysis and time need to be added. Any timesheets requiring this information are marked in red.
Complete individual entries
- Select Entry > My Timesheet from the menu.
- From the Timesheet Entries for page, navigate to the required timesheet.
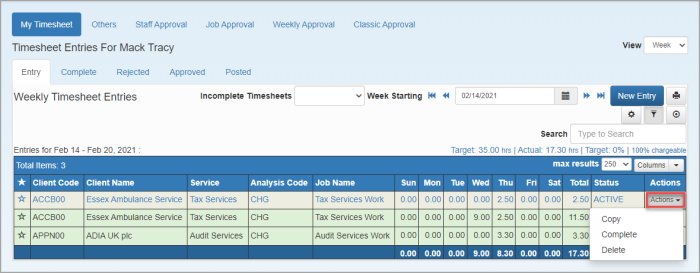
- At the end of the required entry, click Actions and select Complete.

- The line turns green and is marked COMPLETE.
Complete all entries
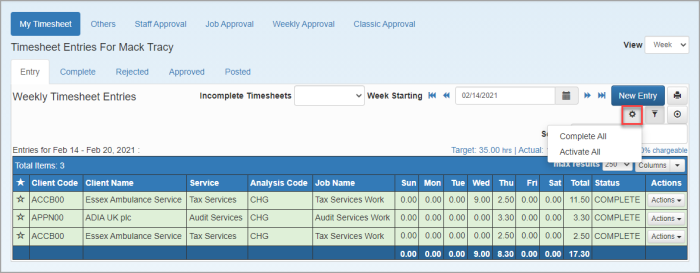
If you are confident that your timesheet data is up-to-date, you can complete all active timesheet entries in bulk.
Only entries that have all mandatory content added can be completed.
- Select Entry > My Timesheet from the menu.
- From the Timesheet Entries for page, click the Cog icon and select Complete All.

Complete entries once filled
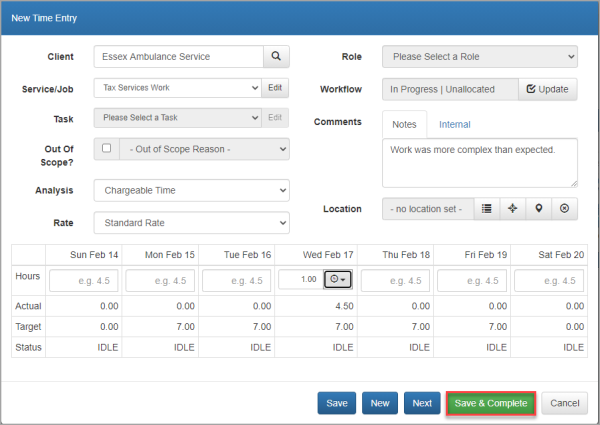
You can also complete your timesheet at the point you fill in your entries by clicking Save & Complete.

Complete timesheet with Classic Approval
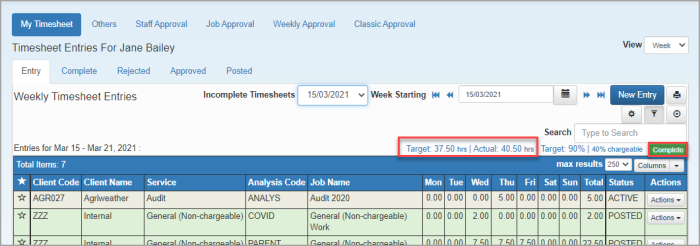
If your Organization uses Classic Approval, when you reach your target hours (the total hours defined in your work profile), you need to mark your timesheet as complete.
- A Complete button becomes available once your target hours have been reached. Click Complete.

- Ensure that you have finished entering time for this week, then click Yes on the Complete Week message.