Create or Edit a Radial Gauge
The creation and subsequent editing of Radial Gauges is guided by a two step wizard.
In the Radial Gauge List, either:
- Click New to display the New Radial Gauge wizard, or
- Click Edit to display the Update Radial Gauge wizard.
Although their layouts are slightly different, the elements of both wizards are the same.
The first step is to create the gauge's listing and define the connection with its data source (Query Definition). In the next step, the gauge's details must be configured. The gauge can then be previewed.
If you want only to edit an existing gauge's details, click Next on proceed directly to that screen (Step 3 below).
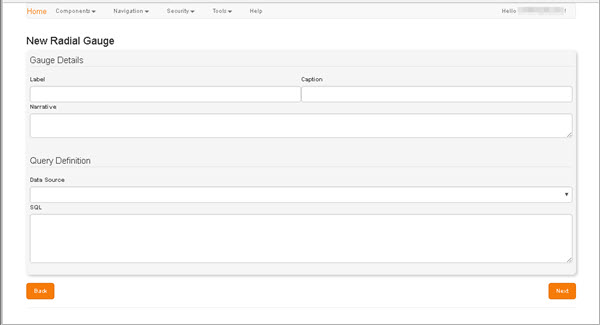
- In the Gauge Details region, define the details by which the gauge will be identifiable:
- Label: Enter a meaningful name or short description for the new gauge. This will be displayed as the gauge's Description, e.g. in the Label column within the Radial Gauge List.
- Caption: Enter a short caption for the gauge. The Caption is displayed within screen headers when the gauge is being edited. If no Label is specified, the Caption is used in its place.
- Narrative (Optional): Enter a concise description of the gauge. This will be displayed beneath the Caption.
- In the Query Definition region:
- Data Source: Select the data source you want to report on.
-
SQL: Enter the SQL parameters that will be used to query the specified data source.
The SQL field is not case-sensitive.
-
Click Next to progress to the next screen, Configure Radial Gauge Details.
The SQL you entered in the Query Definition is validated at this point. If validation fails for any reason, an error message is displayed beneath the SQL field, e.g. "SQL incorrectly specified - Unable to build the embedded [Parameter] collection: ...". Any elements you include in these parameters will subsequently be listed, and can be formatted via the Element List.
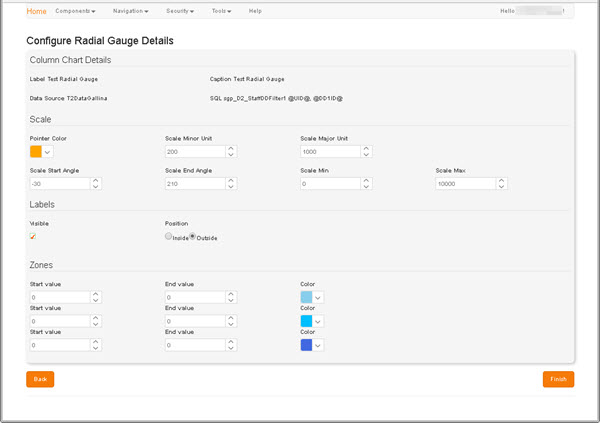
The Radial Gauge Details region presents a read-only summary of the details entered on the previous screen.
- A scale defines a range of values in the radial gauge. In the Scale region:
- Select the Pointer Colour from the drop-down clour chart.
- Enter or scroll to set the Scale Minor Unit and Scale Major Unit values.
- Enter or scroll to set the Scale Start Angle and Scale End Angle values, which define the circularity of the arc.
- Enter or scroll to set the Scale Min and Scale Max values.
- In the Labels region:
- If you want Labels to be displayed in the gauge, select the Visible checkbox.
- Select the appropriate Position for those Labels: Inside or Outside.
-
The arc of the gauge can be sub-divided into three zones, each with different shading. In the Zones region:
- Set the Start Value and End Value for each Zone.
- Select each Zone's Colour.
-
Click Finish.
The new gauge is created, and you are returned to the Radial Gauge List automatically.
To return to the Radial Gauge List without making any changes, click Back.