Entering Time
When entering time, there are various ways in which you can add a new line to a timesheet.
To use an existing line as a basis for a new entry:
- Right-click the previously entered line and select Copy Line.
- A new line is added to the grid, in which all entries except numeric time values and note text default to those of the copied line.
You can also copy lines from an old timesheet to a current timesheet period. To do this, in the old timesheet:
-
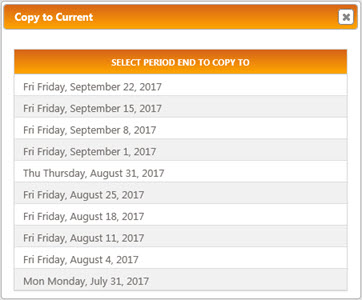
Right-click and select Copy to Current Timesheet.
This displays the Copy to Current window:
-
Click on the Period End date of the timesheet to which you want to copy the line.
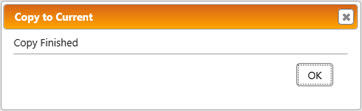
The line is copied into the selected timesheet and a confirmation dialogue is displayed.
-
Click OK.
The current timesheet, into which the line has been copied, is displayed.
Alternatively, to create a new entry from scratch:
-
Either:
- Click New Line.
- Tab out of the last editable cell on the last line in the grid.
- Use keyboard shortcut Alt+N.
One blank line is inserted into the timesheet.
-
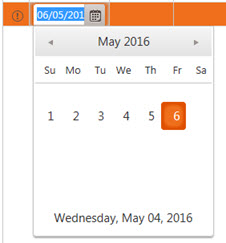
In list view only, click in the Date cell to display a drop-down calendar, and select the relevant date.
Only dates that correspond to the selected time period are available for selection. You can type the date, but it must be entered in the correct date format (as specified in Preferences).
-
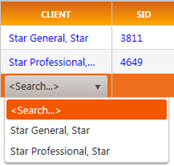
In the Client columns, drop-down controls present any previously selected values for quick selection. Either select a client from the list or, if the Client you require is not listed, click the orange <Search...> header to display the Search window.
A user Preference, Client Fields, specifies which of the two Client columns are displayed.
-
Specify the relevant Job, Stage, Charge Account, Rate and/or State values.
If Entity-level Functional Currency processing is active, rates are based on the Job's Entity Currency, not the user's Timesheet Currency, and the Rates displayed in drop-down controls may not be constant for the whole timesheet but vary by time line when a Job is selected.
State and Stage are optional columns. The display of the State column is governed by a Firm-level switch. The display of the Stage column is governed by a user preference, Display Stage Column.
Once a Job has been selected on one row, that Job or all of the relevant Client's Jobs can be saved as favourites using the timesheet's overflow menu, for quick posting using drag-and-drop from the sidebar.
If the Stage is not applicable, then, if clicked, the search drop-down defaults to N/A.
-
Click within the column that represents the day/date for which you want to enter time. (The default time value for each time period is 0.00.)
The selected cell expands to display a numeric data entry control and, (partially obscured) Note icon.

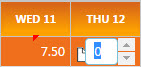
A red flag at the top of a cell (as for Wed 11 in the illustration above) indicates that the cell value has changed, and that the change has not yet been saved. The flag will be removed on the next save.
- Enter the number of hours you want to record for the selected day/date.
-
Click the note icon
to record any explanatory comments against the entered time.You may have the option to select comment text from previous comments. Where this option is available, clicking the note icon automatically displays past comments for selection. These may have been entered either by the timesheet owner, or by any user against the currently selected Job. Simply double-click any listed existing comment to add its text to the current comment. The number of existing comments that are available for selection is specified by a Timesheet Preference, ‘No. of timesheet text entries for selection’.
In grid view only, Comments can also be viewed by clicking the triangle icon in the first cell of the time row to expand it.
Comments may be required. This is controlled in Star PDM, via Firm Details ASTEE Switch Time Text Required.
Comments recorded against dates for which no Time is also entered are not saved.
-
A currency icon between the note icon and an active time cell indicates the presence of Linked Expenses.


You can view those linked Expenses - and, optionally, start a new expense claim - by clicking the currency icon to view the Linked Expenses window.
-
When you have entered all of your time, click Save.
All saved time is included in timesheet totals.
Only saved lines are validated.
In grid view, all of the lines for time recorded against a given Client, Job, Stage, Charge Account, and/or State are merged into one, expandable line.